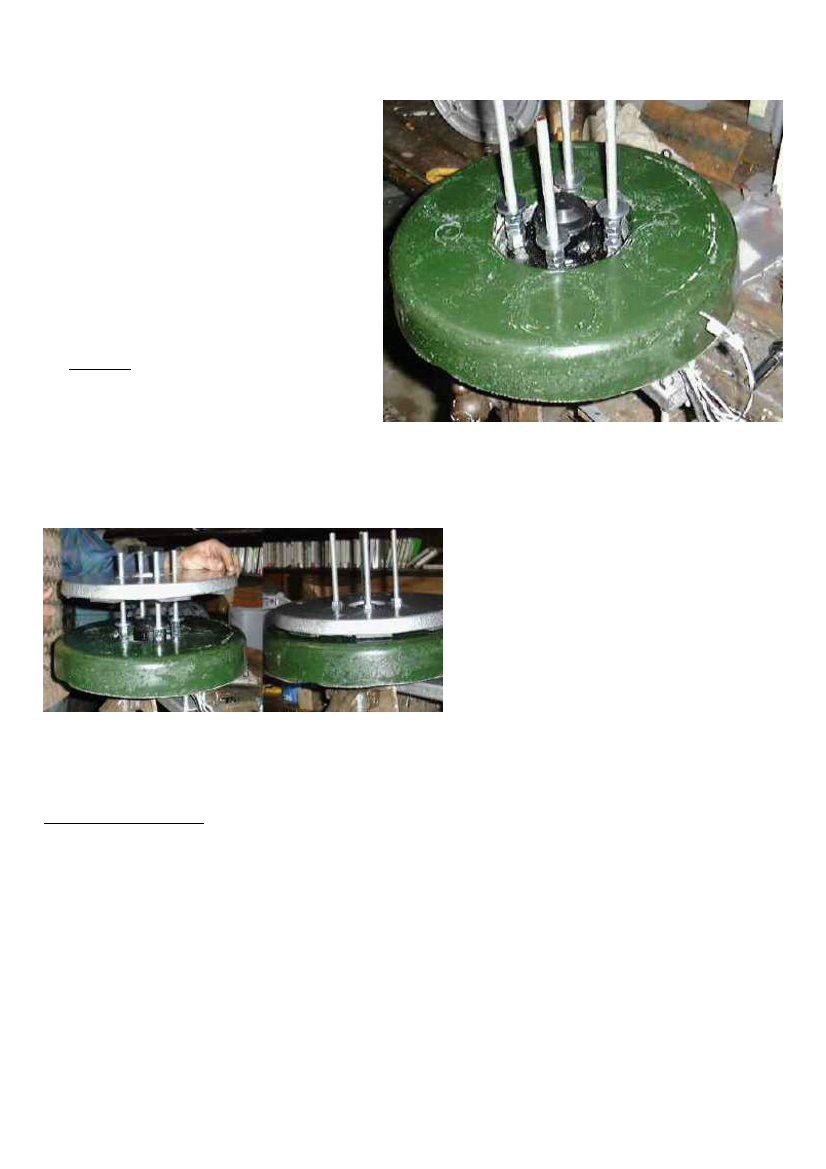
• Place the stator over the rear
magnet rotor and fit its support
studs into the holes in the spine.
Fit more 8 mm nuts to the ends of
the studs.
• Slowly lower the stator, and
rotate the rear magnet rotor. Keep
the stator level in both directions.
You will hear a sound when the
highest magnet touches the stator.
• Use the nuts to raise the stator
equally 1mm on all four studs.
• Fit some washers to the 10 mm
studs which hold the rotors.
Always the same number of nuts
and washers on each stud. A total
Fitting the stator
of six nuts and two washers may be enough. Then fit the front magnet rotor.
Fitting the front magnet rotor
• If the front magnet rotor is less
than 1mm from the stator at any
point, then add more washers
under it. If it is much more than
1mm from the stator then remove
washers. To find the correct
number it is necessary to remove
washers until it begins to rub the
stator. Then add 1mm.
• When the front rotor is 1mm from
the stator, then fit more nuts on
top, and tighten them securely.
Electrical Parts
The next section (Section 7) will describe how to connect the rectifier to the stator.
I recommend using two 'single phase bridge rectifiers' (see diagram 42). They come
in blocks 30 x 30 mm. The positive terminals are both connected to the battery
positive terminal. (They are often at right angles to the other three. ) Both negative
terminals are connect to the battery negative. The remaining four terminals are for
AC connection to the stator. You will probably only need to use three of these,
connected as desired to suit the speed (see Section 7).
PMG manual
page 39
June 2001